Monday, July 4, 2011

Aunt D's Kitchen Is Moving!

Aunt D is relocating the kitchen from Blogspot to Wordpress.  I'll leave everything as is on Blogspot for now, but all future posts will appear at the new Wordpress site.  Here is a direct link:

http://auntdskitchen.wordpress.com/

I'm still learning about Wordpress but I can tell already that it has a lot more functionality.  I'm looking forward to enhancing the blog with all the new toys and trinkets.  I hope you will all continue to follow and keep up with Aunt D!

For those of you who formally follow Aunt D's Kitchen, you can continue to do so on Wordpress.  Just click the 'sign me up' button on the right side of your screen and enter your email address.

Hope to see you all on Wordpress!

Sunday, June 26, 2011

Cowboy Cut Ribeye with Green Bean Salad


Saddle up, boys and girls, and head on over to the ranch!  Ok, so I don't have a ranch - or a saddle, for that matter.  Luckily, one doesn't need to be a cowboy (or cowgirl) to enjoy this beautiful cowboy cut ribeye.

I have to confess that I don't know what a cowboy cut is or how that differs from an ordinary ribeye.  I'm pretty sure I don't care, though.  Any steak this tender and juicy can call itself whatever it wants.

With such a huge steak, I decided to go easy on the side dishes.  Ordinarily, I would make a big batch of mashed potatoes.  This time, though, I went with a warm green bean salad.  It was the perfect combination.

Here's what you need for the steak:

1 steak (any cut that you prefer)
Fresh garlic, minced
Jane's Krazy Mixed Up Salt
Dale's Seasoning (I use the low sodium version)

Smear fresh minced garlic on both sides of your steak then season each side evenly with Jane's.  Place the steak in a zipper back and add about 1/3 cup of the Dale's (use more or less depending on the size of your steak).  Shake the bag to ensure that the steak is completely covered with the marinade.  Let it rest in the fridge for at least an hour.  Remove the steak from the fridge about half an hour before you intend to cook it. 

For the green bean salad:

Fresh green beans
Cherry tomatoes, halved
Mozzarella cheese
Olive oil
Sea Salt

Steam the green beans for  7 or 8 minutes.  Be careful not to overcook them.  When they're ready, toss them with the mozzarella.  Add the cherry tomatoes, a tiny bit of olive oil and sea salt to taste.  Toss well and serve immediately.

Saturday, June 25, 2011

Sweet Summer Appetizer


I was wandering through the grocery store yesterday minding my own business when the guy from the Murray Cheese bar in Kroger literally chased me down to taste the goat cheese he was sampling.  I tried to decline, because I'm not always fond of goat cheese. It was on a lovely cracker, though, and topped with a drizzle of honey.  In general, I do like cheese (a lot) so I decided to give it a try. It was really good and, of course, I rushed right over to grab a wedge.  I have to confess that this is not the first time this has happened to me.  I guess those Murray Cheese guys can spot a sucker from a mile away.

I wanted Michael to taste my new find, so I offered him a snack.  He thanked me for my offer and explained that he wasn't really hungry, so I made one anyway.  I added the strawberry and served it right up.  He immediately asked if I could make about 200 more.  He also insisted that I share it with the rest of the world - or at least the 18 people who actually follow this blog. 

One of those requests is actually doable, so here's what you'll need to dazzle your own family with this sweet summer appetizer:

Sesame crackers
Humboldt Fog cheese
Honey
Strawberries

Top each sesame cracker with a smear of Humboldt Fog and a drizzle of honey.  Add a strawberry and dig in!  You could also use apple wedges, blueberries or just about any other fresh fruit.

Monday, June 20, 2011

Habanero Burger & Homemade Onion Rings


I'm not normally an eater of spicy things, but I've recently decided to try and be a little braver about that.  It may have something to do with my newest addiction - the Food Network and any show with Bobby Flay in it.  Everything Bobby Flay makes just looks delicious and peppers are his signature ingredient.  I wouldn't be surprised if he put them in ice cream.

The new addiction is working out pretty well for Michael.  He loves spicy food. 

I was poking around in the produce section at my local store recently, when I came across the habanero and scotch bonnet peppers.  Yes, I know they are supposed to be the hottest peppers in the world.  Don't ask me what I was thinking.  I have no idea.  Needless to say, both peppers found their way into my grocery cart.  They've been sitting in the fridge for two weeks while I worked up the nerve to actually use them.

Today was the magic day.  I wasn't sure I'd be able to eat the burgers, but I was having a brave moment so I decided to go for it.  I wasn't brave enough to use more than one, so that may have been my saving grace.  The burgers were spicy, but definitely delicious.  The onion rings were a perfect companion for them.

Here's what you'll need for the burgers:

1 1/2 pounds ground beef
1 habanero pepper, finely chopped
1 thick slice of onion, finely chopped
3 cloves fresh garlic, minced
1 thick slice of red bell pepper, finely chopped
2 tbsp of brown sugar
Splash of pepper juice (I used the liquid from a jar of banana peppers)
Jane's Krazy Mixed Up Salt
Freshly grated asiago cheese

Combine all the ingredients in a large bowl and work them together with your hands until everything is well combined.  Form four large patties.  Cook them until they are just done.  Overcooking will dry them out.  Top them with tomato, onion, cheese or whatever you like.

Here's what you'll need for the onion rings:

1 large yellow onion
1 1/2 cups of flour
2 tsp of salt
1 egg
Milk
Bread crumbs
Sunflower oil

Combine the flour, salt and egg in a large bowl.  Add milk until you have a good batter.  It should look like thin pancake batter.

Cut the onion into thick slices.  Dip them in the batter and then dredge them in the bread crumbs until they are well covered.  Fry them in the oil until they are golden brown.

Saturday, June 18, 2011

Fresh Creamed Corn


I've often said that I'm not the most southern southern girl you've ever met, but there are a couple of really southern things that I do like.  One of them is my Mama Sue's creamed corn. 

Mama Sue was my great-grandmother - the one who desperately tried to turn me into a girl when all I wanted to do was climb the giant Magnolia in her yard.  She's been gone for several years now, but she would be happy to know that I turned out to be a decent cook.  It seems to me that she was good at everything but cooking was definitely her special skill and the creamed corn that she made with the fresh corn from her own garden was my absolute favorite.

Today's recipe doesn't attempt to duplicate hers.  Instead, it's my own variation on the theme.  With some fresh corn from the farmer's market - or even your local grocery store - you can serve up this version of an old southern favorite any night of the week.

Here's what you'll need:

4 ears of fresh corn
2 tbsp of bacon grease
1/2 tbsp of butter
1/4 cup of milk (or heavy cream)
1 tbsp of flour
Salt to taste
Chili powder to taste

Shuck the corn really well and get as much of the silk out as you can.  You'll need a large bowl and a sharp knife to remove the corn from the cob.  Using the sharp side of the knife, carefully cut half of the kernels off the cob.  Make sure you don't cut all the way to the cob. Next, use the dull side of the knife to scrape the rest of the corn from the cob.

I used my greasy bacon pan from breakfast to cook the corn.  If you want to do that, too, pour out most of the grease, leaving just a couple of tablespoons plus the crispy bacon pieces that are still stuck to the bottom of the pan.  Add the corn to the skillet, heat to medium and stir well with a wooden spoon, making sure to scrape the bacon pieces from the bottom so that they get incorporated into the corn.

Add the butter and the milk or cream.  I included the flour here because I used 2% milk.  If you have whole cream on hand, you can probably do without the flour.  Either way, stir well to keep things from sticking.

Add the salt and chili powder to taste.  I recommend starting small with the chili powder and working your way up.  You don't want it to overtake the dish, just to contribute.

This only takes about half an hour, so it's an easy weeknight dish.  You can also make it in really large quantities and freeze it for later.  Serve it with fried chicken and mashed potatoes for a full blown southern meal!

Wednesday, June 15, 2011

Mahi Mahi Burger


Fish is one of our favorite things to eat but finding new and interesting ways to prepare it can be a challenge.  The recipe that inspired the Mahi Mahi Burger actually called for salmon.  I was salmon shopping when I found the mahi mahi on sale.  Voila!  A decision was made.  It's not like I really follow recipes anyway so what's one more substitution?

For a low carb version, you can try this patty without the bun and add some steamed veggies on the side.  I would probably cover it in honey mustard.  Of course, that just replaces the carbs with a bunch of fat.  It wouldn't be the first diet rule I ever broke.

If you try this one, be creative.  You could make a spicy version by replacing the banana peppers with something hotter.  You could also replace the peppers with dill pickle relish.  If you go that route, I'd recommend plain mayo instead of the cilantro-lime version used here.

Here's what you need:

1 lb mahi mahi fillets
Bread crumbs
1 thick slice of red onion, chopped
4 thick slices of red onion
4 thick slices of tomato
1 whole banana pepper, chopped
2 cloves fresh garlic, minced
Jayne's Krazy Mixed Up Salt
Sunflower oil
4 bakery buns
Cilantro-lime mayo (see recipe below)

Chop the mahi mahi well with a heavy knife - or use a food processor.  Place the fish in a large bowl.  Add the onion, banana pepper and garlic.  Mix thoroughly with your hands.  Add bread crumbs a little at a time, mixing well after each addition, until the mixture is thick enough to form into four patties.

Heat about 1/4 inch of sunflower oil in a large skillet on medium.  Cook the patties for 5 to 6 minutes on each side until they are completely done.  Spread the mayo on the bakery buns.  Add the fish patties and top with the sliced tomato and onion.

For the mayo:

Combine one quarter cup of mayonnaise with two tablespoons of finely chopped cilantro and lime juice to taste.

Sunday, June 5, 2011

Cheesy Bacon Chicken Breasts


Weeknight meals can be such a challenge, especially for us working moms.  It's so easy to throw a frozen pizza in the oven or just grab some takeout on the way home.  That always feels like cheating to me, though.  I have this strange compulsion (it's not strange to me but it may seem strange to others) to cook everything myself.  I often have to find a way to balance that with the time constraints of every day life.  This dish is fast, easy and satisfies my need to do things myself. 

I recently started using chicken from Springer Mountain Farms.  It has such a natural, clean, unadulterated chicken flavor.  I was completely floored the first time I used their chicken.  For this recipe, I used the boneless breasts.  Because they are thin, they cook really quickly.

You can use any kind of  bacon, but my preference is the thick sliced market bacon from Earth Fare, my favorite healthy supermarket.  They also offer an apple wood smoked version which I use on occasion.  To speed up your weeknight meal, I recommend having the bacon cooked in advance.  If you do that, make sure you save just a little of the bacon grease for cooking.

The cheese I've used here is Havarti.  It's light, creamy and melts very nicely.  It's mild flavor complements the other elements of the dish perfectly.  If you don't have Havarti, Provolone or Monterrey Jack would work just as well in this dish.

The remaining ingredients, banana pepper and red onion, really make this simple meal stand out.  I use red onions in just about everything and the banana pepper has a flavor that really comes through without overpowering that awesome chicken.

Here's what you need to impress your family with a takeout-free weeknight meal:

4 small chicken breasts
4 bacon slices
4 large slices of Havarti cheese
1 large banana pepper, seeded and chopped
1/2 slice of red onion, finely chopped
Bacon grease
Sunflower oil
Jane's Krazy Mixed Up Salt

Start with your grease and oil.  Because I did not cook my bacon in advance, I used the bacon pan for the chicken.  I poured the majority of the grease from the pan, leaving the bottom covered with greasy bacon goo.  Yummy!  If you cook your bacon ahead of time, just save a couple of spoonfuls of the grease for the chicken.  I added just a little bit of the sunflower oil to dilute the bacon grease.

Seed and chop the fresh banana pepper, then dice your onion.  Add them to the pan and let them soften a bit in the grease.  Push them to the sides of the pan to continue cooking and place your chicken breasts in the center.  Season them with a little Jane's, then flip them and season the other side. 

Cook the chicken until it's just about done.  Then place half a piece of cheese on each breast.  Top that with a piece of bacon, then cover the bacon with the other half of the cheese slice.  Cover the pan until the cheese is completely melted.  When you plate the chicken breasts, scoop up the onions and peppers from the pan and put them on top.

Enjoy!  If you decide to try this one, I'd love to hear how it turns out.

Monday, May 30, 2011

Southwest Steak and Eggs on the Grill


My mission to become a goddess of the grill continued today with our Memorial Day dinner.  We totally gorged ourselves on Southwestern scrambled eggs, flank steak and home fries on the grill.  Today was also The Runt's 19th birthday and her favorite breakfast food, aside from cereal, is pancakes.  Just for her, I incorporated pancakes into our breakfast-for-dinner lineup.

I have to give credit where credit is due and it would never have occurred to me to make eggs on the grill if it hadn't been for an episode of 
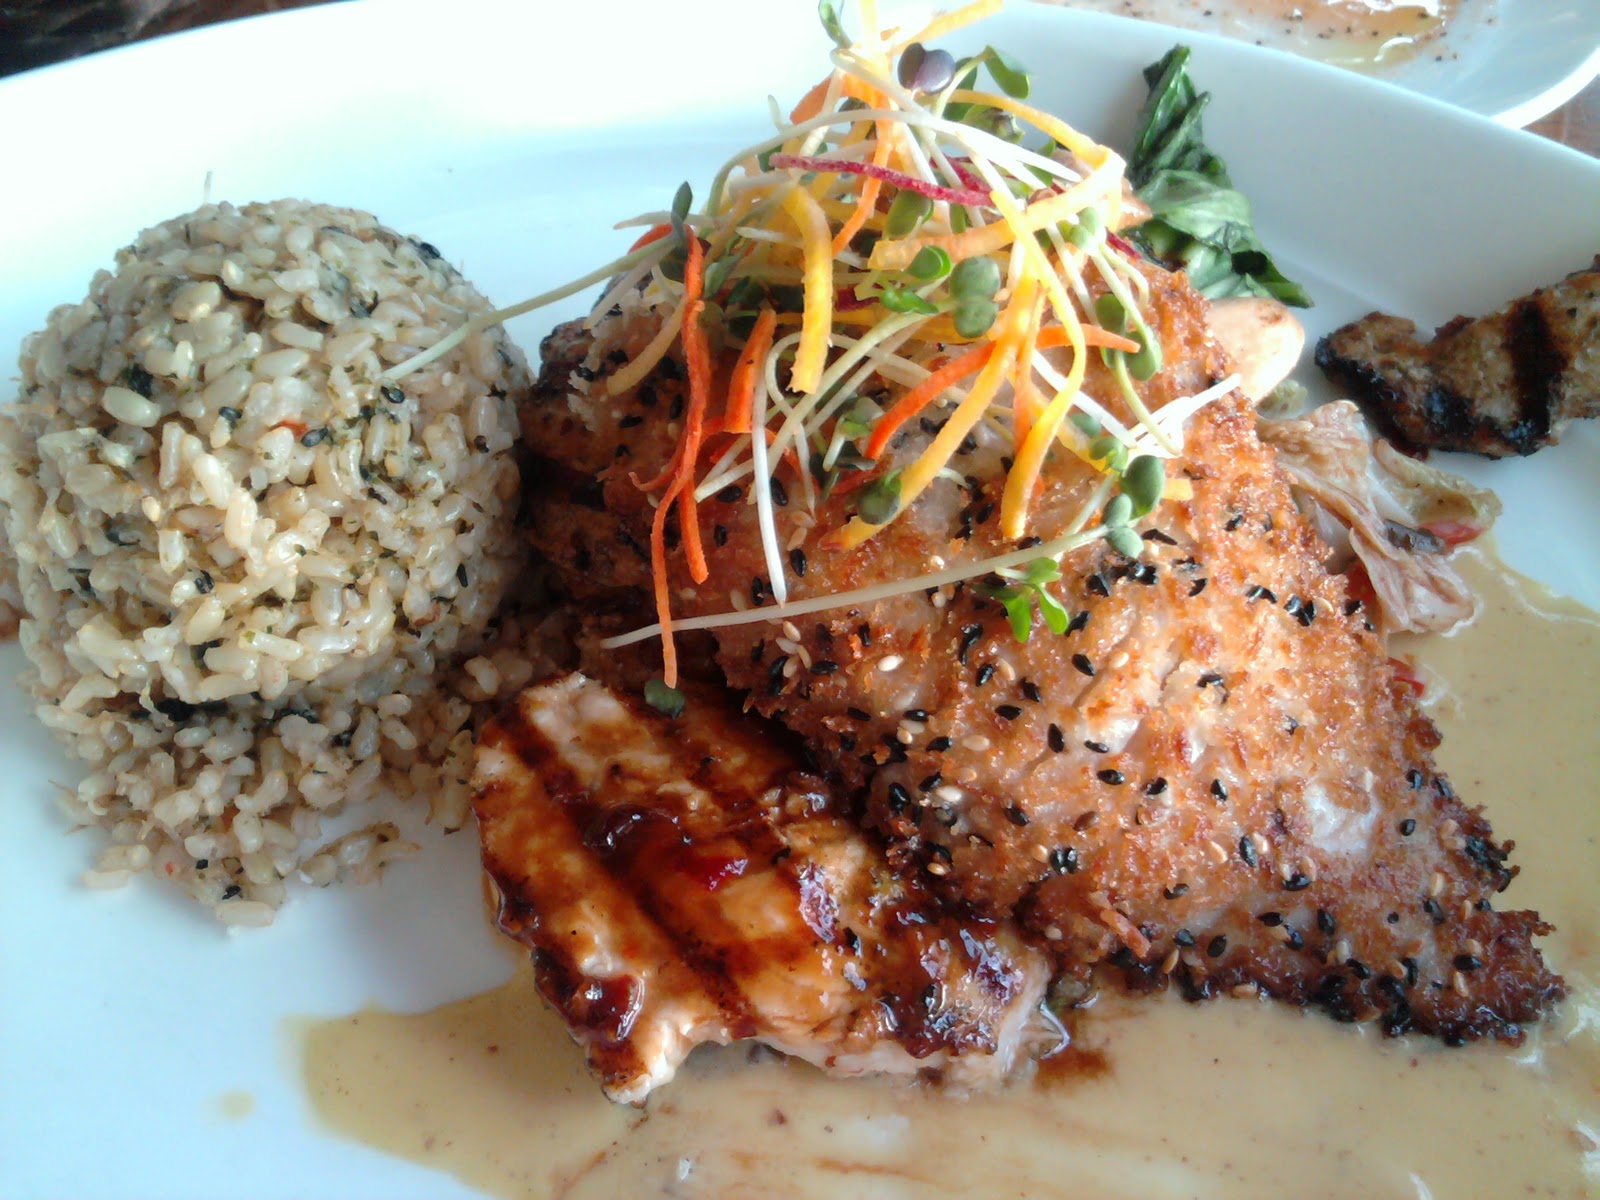
Grill It! with Bobby Flay.  Bobby's meal was an Argentinian breakfast with chorizo.  I went the Southwest route and used a tequila-lime marinated flank steak.  Do you think it was wrong of me to serve Italian bread with it?  Ha!  It was delicious, if just a tad multicultural.

Here's what you need to grill up your own breakfast:

Scrambled Eggs
6 large eggs
4 ounces of Monterrey Jack cheese, cubed
1 slice of bacon, well done and finely chopped
1 small sweet red pepper, finely chopped
2 tbsp finely chopped red onion
2 tbsp unsalted butter

In a bowl, beat the egg well with a wire whisk.  Add all of the other ingredients, except the butter, and mix well.  You'll need a cast iron or stainless steel skillet and the butter to cook them.

Flank Steak

1 1/2 lbs flank steak
3/4 cup tequila
Juice from 1/2 lime
2 tbsp fresh chopped cilantro
Dash of soy sauce
Sea salt to taste

In a bowl, combine the tequila, lime juice, cilantro, soy sauce and salt.  Mix well.  Pour the mixture into a gallon sized zipper bag.  Add the steak and shake the sealed bag until the meat is well coated.

Potatoes
3 medium baking potatoes, already baked and cooled
Olive oil
1/2 slice of red onions, diced
2 cloves fresh garlic

Cut the potatoes into cubes. Pour olive oil into a cast iron pan - just enough to cover the bottom of the pan well.  Add the onions and garlic to the oil.

Because timing is everything when you're cooking on the grill, you want to make sure you do things in the right order.  Start with the potatoes.  Put the cast iron skillet on the grill until the onions are soft and the garlic just begins to brown.  Add the potatoes and let them cook while you finish the rest of your prep work.

When the potatoes start browning on the bottom, it's time to put your flank steaks on to cook.  You can cook them directly on the grill if you want, but I use a cast-iron griddle.  In my opinion, cooking the meat on a flat surface seals in the juices.  Whatever method you choose, place the meat on the grill and don't touch it until you're ready to turn it over. 

When the meat is finished cooking, remove it from the grill and cover it with foil.  Depending on the size of your grill, you may need to remove the griddle (if you've used one).  Place your skillet with two tablespoons of butter in it on the grill.  When the butter is melted, pour your egg mixture into the skillet and scramble the eggs.

If you include bread in your meal, I recommend brushing it with olive oil and tossing it on the grill for a few minutes on each side. You can also drizzle some queso blanco over the eggs and the meat if you want.  Yum!

Sunday, May 22, 2011

Gearing up for Grilling

Aunt D has been on break but she's back now with a summer lineup that will surely make your mouth water. It’s all about the grill this summer – at least that’s my plan. Cooking outdoors is fun, the food can’t be beat and – the best part – you can avoid the never ending saga of Air Conditioner vs. Oven.

I started my grilling season off with asiago bread, bratwurst and chicken. Nothing special about any of those items, but it was my first time cooking bread on the grill. Click here for the recipe. Use a bread machine or stand mixer to make your dough, form two round loaves, cover and let rise for 20 minutes or so. I cooked it for half an hour on a stoneware pan on the top level of my grill. It turned out fabulous!

You’ll notice in the picture that I am using a cast iron griddle to cook the meat. It works wonderfully – seals in the juices instead of letting them drip away (thanks to Terri K. for the tip) and makes it easier to cook your veggies.

My little round grill, even though it has two levels, may not be up to the task. I’m definitely going to need more cooking space. Do I replace the current grill with a larger one? Or do I get another just like the one I already have? I’ll have to think about it.

My plan for next week is breakfast for dinner on the grill. Southwest scrambled eggs, home fries, grilled toast and a meat selection to be named later. Check in with me to see how that turns out!

Sunday, March 27, 2011

Asparagus Stuffed Chicken Breasts


My daughter, affectionately known as The Runt, is a freshman in college. When I moved her into the dorm, I was so pleased to see that there was an Earth Fare (a healthy grocery store with several locations throughout the Southeastern US) within walking distance of her dorm. She opted out of the over-priced campus meal plan in favor of cooking her own meals and that has worked out pretty well.

One of her new favorites is called a Chicken Roller. It’s a ready-to-cook chicken breast stuffed with various goodies. They are sold at Earth Fare’s fresh meat counter. The Runt cooks them on her indoor grill and loves to try out the different varieties.

When The Runt comes home, she craves her mommy’s cooking and, on a recent visit, she asked me to make the Chicken Rollers. This recipe is my version of that meal.

Here’s what you’ll need:

Four boneless, skinless chicken breasts
Two cups of panko crumbs
Two tablespoons of Grill Mate’s Chicken Seasoning
Twelve asparagus spears
Four slices of havarti cheese
Toothpicks

Combine the panko crumbs and the Grill Mate’s seasoning in a flat dish large enough to hold the chicken.

Pound the chicken breasts flat and press one side of them into the panko crumbs. Top each one with a slice of cheese and three asparagus spears. Roll each piece of chicken tightly (with the panko crumbs on the outside) and use one or two toothpicks to hold together.

I cooked mine on the indoor grill for about 15 minutes. You can also cook them in the oven at 350 for 35 minutes or so.

Saturday, March 12, 2011

Hawaiian Fish Dinner - Grilled Swordfish w/Panko-Crusted Tilapia


Before I tell you about this dish, I have to tell you what inspired this amazing yumminess.

Michael and I vacationed in Hawaii about two months ago. I cannot begin to tell you what a wonderful time we had. We spent plenty of time on the beach at Waikiki – me on the beach with a book and Michael snorkeling. We also spent some time watching surfers at Waimea Bay and reading on the beach/snorkeling on the reef at Hanauma Bay. We finished our days with mai-tais in the hotel’s hot tub. It was a wonderful week.


We didn’t make a big deal out of food while we were there but we both agreed that, on our last night, we would splurge on a really nice meal. We made reservations at The Hula Grill, located inside a hotel right on the beach at Waikiki. We sat on an open air deck, overlooking the ocean, and enjoyed live music from the band playing down below while we watched the sun slowly setting over the Pacific.


Our meal started with crusty Italian bread along with olive oil and the restaurant’s own Hula Grill Chili Pepper Water for dipping. The chili water/olive oil combination was new and different and completely delicious. Michael skipped the oil and dove head first into the chili water. Just dipping didn’t do the trick. He poured it over his bread until it was completely soaked. I think he even considered drinking it straight from the bottle. We bought a bottle from the restaurant so that I could thoroughly evaluate it and recreate it at home.


The bread and chili water were so impressive that we were pretty excited about the rest of the meal. Everything on the menu looked delicious. It was a tough decision, but we both ordered the chef’s special (grilled swordfish and panko-crusted opah).


Opah is a mild, white fish found in the South Pacific and it’s one of the most delicious things I’ve ever tasted. It was pan-fried with a coating of panko crumbs and dark sesame seeds. The swordfish was grilled with a slightly sweet glaze. They were served together with steamed veggies and a honey mustard sauce. I promised Michael that I would recreate the entire meal.  My version of our Hawaiian fish dinner is the photo at the top of this post.

Swordfish is easy to find in most places but Opah is a different story. Opah is a solitary fish, which makes it harder to catch. It’s pretty much impossible to find outside the South Pacific so I ended up using tilapia – another awesome white fish. It turned out really well. In fact, Michael swears that my version is better than the original. He is such a sweetheart!

Here is what you’ll need to make your own scrumptious Hawaiian fish dinner:

Two swordfish steaks
Two tilapia fillets
Panko crumbs
Chili powder
Sesame seeds
Dale’s low sodium marinade
Butter (about 2 tbsp)
Sunflower oil

Melt the butter and add a little bit of the Dale’s. Brush this mixture over the swordfish, covering both sides and set the swordfish aside.

Sprinkle a little bit of chili powder on each side of the tilapia. Combine panko crumbs and some sesame seeds. Coat the tilapia well with the mixture.

I use my Foreman grill for the swordfish, but you can cook them under the broiler if you don’t have an indoor grill.

For the tilapia, put some oil in a medium sized skillet. Don’t use too much, though. You don’t want the fish to be deep fried. When the oil is hot, add the fish and cook for about three minutes on each side or until the panko crumbs are a golden brown. Try to avoid turning the fish more than once to keep the crumbs from falling off. I always have crumbs left after I coat my fish and I like to toss some of them into the pan to cook alongside the fish. That gives me some extra ‘crispies’ to add to the plate when I’m serving the meal.

To serve, pour some honey mustard sauce on your plate (decoratively, of course) then add the swordfish and put the tilapia on top.To make your own honey mustard combine mayonnaise, mustard and honey to taste and mix them well.  For the topping, I used pineapple, green onions and red bell pepper in equal quantities. Just mix them together and you’ve got a sweet, peppery salsa.

For the chili water, combine rice wine vinegar, sugar, garlic and chili paste.  Start with lots of vinegar and plenty of sugar.  Add a couple of garlic cloves and the chili paste to taste.  It pairs well with Italian herb bread.

Aloha and mahalo!

Tuesday, March 8, 2011

Breakfast Pizza


From the time I was a small child, mornings were always calm and orderly for me. My mother never overslept, never ran late and never, ever ate a pop tart in the car on her way to work because she didn’t have time for breakfast. Even with three kids to care for, there was rarely a moment of chaos in her house. It was a lovely way to grow up.

I can’t say that I’ve lived up to her standards in every way, but I know I hit the mark in the breakfast department for sure. I give myself plenty of time in the mornings to sit down with a bite to eat and a cup of coffee without having to rush around. I always made sure that my daughter started her days that way and I do the same now for Michael.

When work takes me away from home for a few days, I try to make some meals in advance so that Michael doesn’t end up eating fast food all week. Breakfast can be a challenge, because eggs don’t always reheat well. The breakfast pizza is my solution to that problem. It also works well if you are one of those eat-on-the-run kind of people. Just nuke it and go. Way better than a pop tart.

Here’s what you’ll need:

1 large pizza crust (click here for my pizza crust recipe)
2 cups of mozzarella cheese, finely shredded
4 large eggs
4 slices of crispy bacon, crumbled (the thick-sliced stuff that doesn’t shrink when you cook it)
¼ red bell pepper, diced
Diced green onions (about ¼ cup)

Spread the cheese evenly across the pizza crust. Next crack the eggs on top of the cheese. Try and space them out evenly. With a fork, break the yolk and gently encourage the whites to spread around as much as possible. Be careful not to stick your fork all the way through the crust. Spread the crumbled bacon, bell pepper and diced onions evenly across the top of the pizza.

Bake at 350 degrees for 20 minutes or until the egg is no longer runny.


Saturday, February 26, 2011

Fried Stuffed Mushrooms


I like mushrooms.  I really do.  But I don’t trust them.  Any time I am about to eat them, I have this fear that they are going to be gross or slimy or something.  I always cringe a little before taking that first bite. I have no idea what any of that is about.  And I can’t think of any other food item that makes me feel that way.  It’s weird, I know.  For those of you who haven’t met me, weird is one of my endearing personality traits.   Enough about me and my weird mushroom thing.  Let’s get down to business and talk about the most delicious fried, stuffed food item that you’ll ever eat!

Here’s what you’ll need to make your own non-slimy, non-gross, totally delicious ‘shrooms:

A whole bunch of white button mushrooms
1 packet of cream cheese, softened
3 or 4 slices of well done bacon (the really good, thick-cut stuff that doesn’t shrink)
Garlic powder
Onion powder
A splash of Worcestershire sauce
2 large eggs
Flour
Bread crumbs
Oil

Here’s what you’ll need to make the horseradish dip:

Mayonnaise
Sour cream
Horseradish
Splash of hot sauce

Before you get started on the ‘shrooms, go ahead and make your dip. Use about a cup of mayo, 2 or 3 tablespoons of horseradish, a small spoonful of sour cream and the splash of hot sauce. These measurements are extremely approximate. Extremely approximate means that, as I dumped each into the bowl, I made a mental note of how much it seemed to be. With that said, I would recommend starting with a small amount of horseradish and adding more to taste. It’s got a little zing to it. The hot sauce I used is actually a dip that Michael and I brought back from The Hula Grill in Waikiki. I’ll be reverse engineering it soon (because Michael ate it all) and will post that recipe once I’ve got it figured out.

Now that you’ve got your dip ready, it’s time for some serious shroomage.

Heat the oil in a large sauce pan or deep fryer. The oil needs to be very hot.

Beat the two eggs in a bowl and set them aside. Combine enough flour and bread crumbs to cover the number of mushrooms that you have.

Combine the cream cheese, bacon (well crumbled, of course), garlic powder, onion powder and Worcestershire sauce in a bowl. Blend well with a fork. You can even do this step a day ahead and keep the mixture in a covered bowl overnight in the fridge.

Rinse the mushrooms in cool water and place them on a paper towel to dry. Remove the stems by carefully snapping them off. If you do it correctly, you’ll have a perfect little hole under the mushroom cap where the stuffing goes. If the stems don’t snap off perfectly, use a small knife to carve out the rest. Just be careful not to dig all the way through the mushroom.

Fill the hole in the mushroom with the cream cheese mixture. Dip the filled mushroom caps into the egg and roll them around until they are completely covered. Next, roll them in the mixture of flour and bread crumbs until they are completely covered. Drop the breaded mushrooms into the hot grease and allow them to cook for 2 to 3 minutes. You may need to turn them upside down for another minute before removing them from the grease so that they brown on all side.

Remove the mushrooms to a plate lined with a paper towel. Serve immediately with horseradish dip.

Those of you in the Nashville area can get locally grown mushrooms from Stones River Market.

Friday, February 25, 2011

Ole, Amigos! It's Taco Salad Time!


I’ve never been to Mexico, but it’s definitely my favorite place to eat! This new recipe makes it even easier to create a little south-of-the-border action in my own home. Kudos to my boss, Mike, for sharing the recipe and thanks to Mandy for the taco salad idea.

To say that I love, love, love, LOVE tacos and the other yummy things you can make with taco meat would be a serious understatement. Even so, taco seasoning was not one of the first things I tackled when I began eliminating packaged food and making everything from scratch. I thought about it for sure, but I guess I doubted whether or not the homemade version could ever be as good as the stuff in the little packets. Then Mike brought his lunch to work and it just smelled so good. I had to have the recipe and, when I got it, I couldn’t wait to make it.

Fast forward a couple of days . . . . . I was in the kitchen with all my ingredients lined up on the counter and ready to go. I glanced at the recipe, set it aside and began measuring (sort of) all the goodies and dumping them into a bowl. About halfway through, I thought to myself, “This sure looks like a lot. Maybe I’d better double check the recipe.” When I looked at the recipe again, everything was in teaspoons. I was using tablespoons. It was too late to start over because I had just used the last of the paprika. Besides, it’s not like the extra would go to waste in my house. So, basically, I ended up with three times the amount that I was trying to make. Oops.

Here’s what you’ll need to make my version:

3 tablespoons of flour
2 tablespoons of chili powder
2 tablespoons of paprika
1 tablespoon of sea salt
1 tablespoon of onion flakes
1 tablespoon of cumin
1 tablespoon of cayenne pepper (or to taste)
1 tablespoon of garlic powder
1 tablespoon of ground oregano

Here’s what you’ll need to do it the right way:

4 teaspoons of flour
2 teaspoons of chili powder
2 teaspoons of paprika
1 teaspoon of sea salt
1 teaspoon of onion flakes
1 teaspoon of cumin
1 teaspoon of cayenne pepper (or to taste)
1 teaspoon of garlic powder
1 teaspoon of sugar
1 teaspoon of ground oregano

Combine your ingredients well in a small bowl. Use it just like you would the taco seasoning in a packet – brown your meat, drain it, add water then add your seasoning.

¼ cup of my version seasoned two pounds of ground beef. I put the rest in the spice cabinet in a Ziploc bag. Mike used his entire recipe to season 1 ½ pounds of ground turkey. I used a little more than a cup of water. I believe Mike used a little less.

For the taco salad, I layered chopped iceberg lettuce, taco meat, tomatoes, red onion, banana peppers and avocado on a plate. I topped it with my homemade buttermilk avocado ranch dressing.

Here’s what you’ll need for the dressing:

1 avocado
Mayonnaise
Buttermilk
Ranch dressing mix
Juice from 2 lime wedges (or 2 packets of True Lime)

Halve the avocado and scoop the insides into a bowl. Add the mayo but make sure you have a little less mayo than avocado. That way your dressing is more green than white. Mush them together really well. Add buttermilk a little bit at a time, combining well after each addition, until you get the desired consistency. Add your lime and then the ranch mix to taste. Mix well and serve.

Saturday, February 19, 2011

Hail Caesar!


About sixteen years ago, I discovered Caesar salad. It’s been my one true salad love ever since and the hardest part of this long-term salad relationship has been finding a good one. Not all Caesars are created equal, you know. I’ve found a few places here and there that make a decent one. I’ve also been disappointed a lot. The reigning king of Caesar for many, many years has been McAlister’s Deli but this post officially marks the end of that era. McAlister’s will have to settle for second place from here on out because Aunt D has perfected the art of homemade Caesar dressing.

Here’s what you’ll need to start your own love affair:

4 cloves of garlic
4 tbsp of red wine vinegar
1 cup of mayonnaise
2 ounce container of anchovy fillets
2 tbsp of Worcestershire sauce
2 tsp of lemon juice
½ cup of grated asiago
¼ cup of olive oil
Salt and pepper to taste

Before you freak out about the anchovies, let me just say that they are absolutely necessary. If you’re thinking that it just sounds gross, you’re right. It sounds completely gross and my initial reaction was to leave them out. I decided to be brave, though, and left the anchovies in. It was definitely the right call. I learned that anchovies are what make Caesar dressing taste like Caesar dressing. If you’re still nervous about it, then start with less than the recipe calls for and work your way up. You won’t be sorry.

Puree everything except the oil, salt and vinegar in a blender. Add the oil slowly without stopping the blender. When everything is nice and creamy, add your salt and pepper to taste. Voila! Caesar dressing.

For the grilled chicken version, I use boneless skinless breasts and cut them in half sideways so that they are very thin. Season them with McCormick’s Grill Mates Chicken Seasoning and cook them on the George Foreman grill.

Use Romaine lettuce and tear it into small pieces. Put the lettuce into a large bowl with a lid. Add the dressing then close the lid and shake until the lettuce is completely covered. Put the lettuce on a plate and top with the warm chicken. Grate fresh asiago over the top and add croutons.

The croutons you see here are homemade. I used bread that I made, cut it into cubes and toasted it in the oven. The bread had seasoning baked into it, so it didn’t really need anything else. When I make croutons from plain white bread, I toss the cubes with melted butter and Italian seasoning before toasting. Spread your bread cubes evenly across a cookie sheet and toast at 300 degrees until they are crispy.

Tuesday, February 15, 2011

Are Those Boobs In Your Oven Or Are You Just Happy To See Me?


I know it looks bad, but it’s not porn.  I swear.  It’s more like pastry that went slightly awry – but only where appearances are concerned.  This stuff totally rocked the house in the taste department.  To borrow a line from Adrian Monk, here’s what happened . . . . .
I was reading a new food blog I found called Baking My Way Through Germany.  The blogger was writing about how she recently discovered brioche in cooking school.  Of course, that reminded me that I hadn’t had brioche in forever so I decided to make some.  I dug out my recipe and got started.
The dough was in the bread machine doing its thing while I worked on an article and then made some lunch.  Long story short, I got busy and forgot all about it.  Because pastry dough is sweeter than most of its counterparts, it rises really well.  In this instance, it was trying to burst out of the bread machine by the time I remembered to check on it.  I peeled it off the lid of the machine and knocked it back down a bit.
With the dough once again under control, or so I thought, I proceeded according to plan.  I formed six brioches and put them in my muffin pan.  I checked on them about halfway through the regular baking time and that’s when I found the boobs in my oven.  The little buggers had clearly risen way beyond my expectations.  I had to alter the cooking time and temperature, but they turned out pretty well.  I do try to avoid eating food that looks like body parts, but I made an exception this time.  They were totally delish!
If you want to make your own, I recommend paying attention to the dough and making twelve of them instead of six. 
Here’s what you’ll need:
1 cup + 3 tbsp of milk (warm it in the microwave before adding it to the bread machine)
4 ½ tbsp of butter
2 eggs
3 ½ cups of bread flour
3 ½ tbsp of sugar
1 ½ tsp of salt
1 ½ tsp of bread machine yeast

As always, follow your bread machine manufacturer’s instructions for adding the ingredients to your machine.  Set your machine to the dough setting and pay close attention to it.  When the dough is ready, remove it from the bread machine pan onto a lightly floured surface.   Separate it into twelve pieces.  From each piece, tear off a smaller piece for the top.

Roll the large pieces into balls and place them into your muffin pan.  I used a stoneware pan from The Pampered Chef and greased each cup with a small amount of butter.

With your fingertips, make a small indentation in the top of each large ball.  Roll the small pieces into balls and place them into the indentations.

Brush them well with a beaten egg and sprinkle with lots of sugar.
Bake for 20 minutes at 375 degrees.

If you insist on recreating my accidental version, here is what I did:

Let the dough rise for at least an extra half hour.  Make six of them instead of twelve.  Bake for 13 minutes at 375 degrees, and then lower the temp to 325 for another 10 minutes.  Turn the oven off but wait another 15 minutes before you remove the pastries.

Serve with butter and your favorite homemade (or store bought) jam.  They are boob-i-licious!!

Saturday, February 12, 2011

Italian Herb Bread


Have you ever wanted a pair of shoes so badly that you bought an entire outfit just so you would have something to wear them with?  I have.  Sometimes the accessory gets to drive the bus and that’s absolutely the case with this bread. 

The twenty minutes that it spends baking is nothing less than torture.  The Asiago is the secret ingredient and when it bakes, everyone within sniffing distance drools uncontrollably.  Serve it with anything you want because the main dish always takes a back seat to this accessory!

Here’s what you’ll need:

1 cup water plus 2 tbsp
2 tbsp butter
3 cups bread flour
Grated Asiago cheese
1 tbsp sugar
Italian seasoning
1 1/2 tsp salt
1 1/2 tsp yeast

Before adding the ingredients to your bread machine, measure your flour into a separate bowl.  Add plenty of Italian seasoning and freshly grated Asiago cheese.  Blend the flour, seasonings and cheese thoroughly before putting them into the bread machine.

As always, add the ingredients to your machine in the order specified by the manufacturer then choose the dough setting.  When the dough is ready, remove it from the machine and place it on a pizza pan.  Roll it out just like you would pizza dough.  Brush with a small amount of olive oil and top with more grated Asiago.  Bake at 350 degrees for 20 to 25 minutes or until the top of the bread is golden brown.

Slice it with a bread knife and it's ready to serve!

Wednesday, February 9, 2011

Potato Soup


This is the perfect solution if you have potatoes that you need to use pretty quickly.  I had about five pounds of russets that were approaching expiration and I’m not a fan of throwing food out.  I can tell you that they were quite happy to become soup instead of trash.

Here’s what you need:

Potatoes
Chicken broth
Water
Onion
Garlic
Salt
Chives
Flour
Milk
Sour cream

Peel and dice the potatoes.  Heat the chicken broth and water in a large pot on the stove.  The mixture should be at least half water, more if you want to go easy on the broth.  Add the potatoes to the water/broth mixture and bring them to a boil.  Lower the heat and allow the potatoes to cook until they are soft, stirring occasionally.

When the potatoes are soft, return them to a boil.  Begin sprinkling flour into the pot a little at a time.  After each addition, stir well to ensure that the flour is dissolved before adding more.  Continue adding small amounts of flour until the soup reaches the desired thickness.  Keep in mind that it will continue to thicken after it has finished cooking.

Add fresh garlic (or garlic powder if you don’t have fresh), chives, finely chopped onion and salt to taste.  Finish up with a splash of milk and a big dollop of sour cream. 

Combine everything thoroughly and let the soup cook on the lowest setting for another half hour.

Suggestions: If you don’t have chicken broth, use beef or vegetable.  You can also skip the broth entirely, if you want.  Try serving it with crumbled bacon on top to jazz it up a little.

Serve with a simple salad and some crusty bread for a complete meal.

Saturday, February 5, 2011

Tequila Lime Chicken & Salad


Step away from the shot glass.  Your tequila has found a higher calling.  And I've finally found some serious competition for my one true salad love - the Grilled Chicken Caesar.  Like the Caesar, this salad is no sissy.  Served with a homemade cilantro-lime dressing and a couple of warm flour tortillas, this is a meal fit for even the heartiest of appetites.

Here’s what you’ll need for the chicken:

Boneless skinless chicken breasts
Fresh cilantro
Fajita seasoning
Lime juice
Tequila
Water (for the quick version)

You may have noticed the conspicuous absence of measurements in this recipe.  Sorry about that.  I haven’t completely reverted back to my default setting. It’s just that amounts truly don’t matter for this one.  It’s a salad.  Make a big one.  Or a little one.  Or something in between.  You can decide.

Pour about a cup of tequila into a pan.  Add a handful of finely chopped fresh cilantro, a packet of fajita seasoning and the juice of two limes.  Mix well.  Add your chicken and marinate for several hours.

I recommend grilling the chicken (baste it periodically with the marinade) and serving it, chopped, on top of the salad.  If you are pressed for time, though, you can cook it on the stove.  If you go that route, chop the uncooked chicken breast into bite sized pieces and place them in a skillet along with the marinade and up to a half cup of water.  Cover the skillet and cook on medium until the chicken is done, stirring periodically.

Here’s what you’ll need for the salad:

Spring mix lettuce
Tomato
Avocado
Red onion
Cilantro
Sea salt
Shredded cheese
Chicken
Warm tortillas

Chop the tomato and the onion into chunks.  Halve the avocado and gently remove the insides from the peel.  Place the avocado halves flat side down on a cutting board and slice them lengthwise into several thin pieces.  Finely chop a handful of fresh cilantro.

Cover a plate with a thick layer of the spring mix.  Top with tomato, onion, cilantro and avocado slices.  For the best presentation, scatter them evenly across the salad. Sprinkle with sea salt and add the chicken just prior to serving.  Top with shredded cheese.

To warm the tortillas, place them directly on the middle rack of your oven at 200 degrees for two or three minutes.

Here’s what you need for the cilantro-lime dressing:

Lime juice
Jane’s Krazy Mixed Up Salt
Sunflower oil
Apple cider vinegar
Cilantro, finely chopped
Honey (a very small amount)

Combine the ingredients in a bowl or other container.  Mix well.  Taste the dressing and adjust your ingredients accordingly.  It should be tart and a tad salty, with a hint of sweetness.

Pour the dressing over the salad just after you’ve added the sea salt and the chicken. 

Saturday, January 29, 2011

Panini Sandwich & Homemade Chips


Who doesn’t love a good Panini sandwich?  It’s the perfect way to jazz up a would-be ordinary sandwich, especially in winter when many of us crave a warm meal.  The sandwich featured here is a spicy Italian Panini and it works well with a variety of things that you probably have in the fridge.  I use Boar’s Head meats and cheeses.  Knoxvillians can find Boar’s Head at Kroger.  I’m not sure if any other local grocery stores carry it.
The chips are homemade and they really make the meal.  It’s certainly easier to open a bag of chips from the store, but I love being in charge of exactly what goes into my food.
What you'll need:
Sandwich
Thick slices of bread (I prefer a really good sourdough)
Salami slices
Pepperoni slices
Provolone cheese slices (Muenster works really well, too)
Mayo
Spicy brown mustard
Banana pepper rings
Tomato slices
Onion slices
Italian seasoning

Potato Chips
Potatoes
Sunflower oil
Salt

To prepare the sandwich, apply the mayo and mustard to your bread.  Start with your meat and stagger the slices so that they hang off the side just a bit.  Put the cheese on top of the meat, staggering the slices again.  Next add your onion slices, then your peppers.  Place the tomato slices on top and sprinkle some of the Italian seasoning over them.  Top your sandwich with the remaining slice of bread.

If you don’t have your own Panini press (I don’t) there are a couple of other options for you.  I use my George Foreman grill.  You can also use a cast iron skillet with a grill press.  Once your bread begins to brown, remove the sandwich.  You don’t want to overcook it.

For the chips, I use the Ultimate Mandoline from The Pampered Chef to slice my potatoes.  Some other slicey tool will probably work equally well.  I don’t recommend using a knife, though, because your slices will likely be too thick.  I cut my potatoes in half and place them flat side down into the mandoline.  The more pressure I apply, the thicker my slices are.  I try for a not-too-thick but not-too-thin slice.  First-timers should experiment to see what they like best.  Just remember, thicker slices will need to cook a bit longer.

Heat your sunflower oil on the stove top (or in your deep fryer) while you are slicing your potatoes.  Make sure the grease is hot before dropping your chips in. Add them one at a time to prevent them from sticking together.  As the chips begin to turn brown, remove them from the grease and place them on a plate lined with paper towels.

Different types of potatoes are more chip-friendly than others.  Russet potatoes are not my favorite.  Try Yukon Gold instead.

Wednesday, January 26, 2011

Valentine's Day Recipes

Just a quick note to let everyone know that I've recently started working as a contributing writer for Cook at Home - an online food magazine for home cooks.  Here is a link to my first official article.  I hope you enjoy!

http://www.cookathomemag.com/vdayideas.htm

Saturday, January 22, 2011

Stovetop Lasagna


If you’re like me, you love homemade lasagna but rarely have the time to make it.  This recipe offers a pretty good solution to the problem.  You get the same taste, without the time consuming hassle.
The recipe calls for ground meat.  I would typically use ground turkey in a recipe like this but I recently decided to get a little bit adventurous.  I did use the turkey, but I added some Italian sausage to give the dish a little more flavor.  Sounds tasty, right?  Right.  Unless you choose the hot Italian sausage.  I mean the kind where hot  means set yourself on fire.  I thought the whole thing was a four alarm nightmare.  I literally could not eat it.  Michael ate piles of it, though, and went back for more.  Then again, I’m pretty sure he could eat lit matches.
Here’s what you’ll need to make your own:
Lasagna noodles
Pasta sauce
Ground meat
Ricotta
Finely shredded mozzarella
Grated Asiago (Romano or Parm will do if you don’t have Asiago)
Fresh garlic
Italian seasonings

While browning your meat in one skillet, heat your sauce in another.  If you are using store-bought sauce, add seasonings to taste and plenty of fresh garlic.  If you’ve made your own sauce, it should already be adequately seasoned.  Next, break your lasagna noodles into pieces and lay them on top of the sauce.  With a wooden spoon, gently push them down to the bottom of the skillet.  Let the sauce continue cooking until the noodles are soft.  (They will feel squishy when you press them with your spoon.)

When the meat is ready, drain it on paper towels. When your noodles are soft, add the meat to the sauce by spreading it evenly across the top and pushing it gently down into the sauce until it is completely covered, but do not stir.  Next, add a thin layer of mozzarella and let it melt.  Then drop spoonfuls of ricotta into the sauce making sure you spread the cheese evenly across the pan.  Press the ricotta down into the sauce until it is covered.  Let your lasagna cook until it is bubbly and then spread plenty of Asiago across the top. 

Serve with garlic bread and Caesar salad.  And a fire extinguisher if you go for the super spicy version!